Friday, October 5, 2012

The Normanblet

"Here, go through this. It should only take you about an hour." Ok, Lucas. He hands me a beat to hell and back half Noblet, half Normandy 10 clarinet. I go through and do some key fitting, corking, pad seating and venting. It's all playing.

But...


Uh oh. I have a stripped thread in a post. Well, let's fix it.  First thing to do is figure out a plan of attack. I opted to make a plug to replace the missing material. The first step was to remove the damage post from the body. This was done by simply unscrewing it. Once it was out I did some measuring and math. Yes, captivating math.


Now I have the thread sizes I will use determined. I also know what sizes of drills to use, along with the size to turn the plug too. So with the correct size hole in mind, I began to drill out the post. I progressed through several sizes of bits, only taking out a small amount of material each time. This made it easier to hold on to the part as I drilled it.


Next, I simply tapped the post to a 3-56 thread. This size left enough material on the post while allowing the plug to have enough material as well.


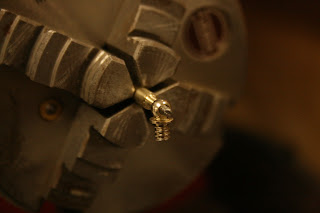
Here comes the fun stuff. I began to make the plug.  The plug was made out of a rod of nickel silver(brass.) This was all done on the lathe. First I faced a piece of .156'' rod. Next I turned it down to .099''

Now I just cut threads with a 3-56 die. Afterwards I drilled a hole for the new hinge rod threads and tapped it.


The drilling and the threading displaced nickel silver a little bit. Therefor the outer threads were a little expanded. I wanted to run the die over them once more. However, because the wall of the plug was now so thin I made a steel screw to insert into the inner threads to help the plug hold shape.


Now I double checked the outer threads and cut off the plug, leaving in the spacer screw for support.

Because the new threads were cut to a 1-56 rather than a .3-56 or whatever, I made a new hinge rod. I threw the post back on the body to check fit quick before setting the plug in for good.


To secure the plug into the post I soft soldered it. Very little solder was needed to fill the gaps between threads.

I then cleaned up both sides of the post by removing the excess material of the plug.

Unfortunately, when the plug was soldered in, It began to bind the screw.  This was remedied by loosening the posts threads and epoxying it into alignment.

So there it is. New threads!


I have several other issues to resolve with this clarinet, a cracked middle tenon, a loose post assembly, major key play with head point screws...the list goes on.


Monday, October 1, 2012

Hinge Rod Replacement

Who wants to see me make a replacement hinge rod? No one? Too bad, because that's what I am going to show in this post.

So on my school clarinet I found the G#/C# key had a lot of lat play. Because of the way it is made swedging is impossible. The only option is to replace the hinge rod with a larger one. So that's what I did.

Here is the problem key. I can't really show the play but trust me, it's there.
So the first step is finding the right size drill rod to replace the current rod with. I started by measuring the old rod and then trying over sized rods till I found one that fit.


Notice there is hardly any difference between the two. However, a few thousandths of an inch makes a big difference in instrument repair.

Once i found the right size drill rod I found that the key was bent. This was determined by the fact that the new rod would go in about 3/4 of the way and get snug. This happened from both sides of the key.

So how do you fix the bent key? You hit it.

I braced the key on either side and hit it with a light mallet  to bend it back into straight.

After some percussive motivation the key was straight and moved freely on the over sized rod.

So now it was time to cut the new hinge rod out of the drill rod stock.
I began by chucking the new rod in the bench motor and measured the major diameter and pitch of the old threads. I then filed the new rod down to that diameter.


More and more filing went on. I put a sharp face on the end of the taper to give the screw a solid stopping point when it hit the post. I cut a deeper grove in the end as well to prevent the threads from tapering. This probably doesn't make a whole lot of sense so here are more pictures.


Oh no. It's time for math. There is a formula to figure out standard threads via the pitch and diameter. Unfortunatly, while Vito does use standard pitches, they do not use standard diameters. The standard system  goes from 0-12 in whole numbers. This thread came out to something like .57. So what now? I can't cut it to a 0-56 or it will be loose in the post. I can't cut it to a 1-56 because it won't even fit in the post. The solution is a split die. They allow for expation and contraction of the cutting teeth. I slimply put the old screw into a 1-56 die and tightened it until it fit snugly. There is my .57-56 thread.


Now to cut the threads!

The key here is to, one, keep the teeth lubricated and clean, and two, to get the die started square.


Time for more filing. This time I just want to put a strong edge back on the inner end of the threads.

Pretty, huh? Now to cut it to length. First I put it into the instrument and marked the length I needed with a file. I then cut it off, faced it and put a slot in it for the screw driver.


Well, there it is. New hinge rod. In my next entry I will have to repeat the process. However, the hinge rod isn't the issue. It's something more. Stay tuned.
So, I left off with a clean, padded, corked clarinet. All that was left was replacing tenon corks and play testing.

Since the tenons were all ready clean all I had to do was throw some new ones on it. Except, I ran into an issue. The bell tenon was too tight and was holding the bell even without a cork.


I remedied this by removing material from the bell. However, before I could do this I had to modify a tool. My solder scrapper needed to be razor sharp in order to cleanly shave material from the bell. So, I began to hone it. I progressed through a few grits of diamond and stone hones until I had a near mirror finish and an edge that you could only see and appreciate via a 10x eye piece.
 Here are some pictures of the before and after.


Okay. Now I scraped out some material from the bell and cleaned up the scratch marks from the scraper with some 1200 grit and some buffing compound. Everything fits together nicely with no binds. Time for tenon corks.

The first step in doing a tenon cork is determining the correct thickness of cork to use. Generally it's a 1/16''. However, it can very so it's always good to check. After it is determined  simply cut the cork to width with a razor blade and a straight edge, bevel one end, lightly bevel the sides(if the cork is thick enough to be noticeable ) and apply contact cement to both the cork and the tenon. Once the glue has dried for at least 15 minutes apply the cork to the tenon.


Once the cork is all the way around the tenon, trim it off. Then sand it so it is even and the right diameter to fit into the socket. Then coat it with wax and apply a very sparing amount of cork grease.


At this point all I had left was reassembly and playtesting. I did find there to be a few stuffy notes. I fixed them(to the best of the instruments ability) by increasing venting. Some notes, mainly the g#/c#, just(pun intended) blew.

Here is the final product.

This project was a great time. It's amazing to me that this project took us all more than a week. Most shops and technicians can do repads in under 7 hours.

After the repad I began working on my school clarinet and learned some fun skills there. I will be sharing those shortly.